: ) Epson Printer Setting with small setting change. Click on Read More.
Step: 1 ) Read my last blog to get started by clicking here. If You already read or you knew about it you can skip it.
Step: 2 ) If you did the exact same process what we did in the last blog you will in printer set up page. if yes, please follow the process else check out the last blog and visit this blog again.
Step: 3 ) Open the PDF you saved in chrome or in any browser you liked or using.
Step: 4 ) Click on Destination and select Epson M200 Series
Step: 5 ) In Pages (Second Option) Select Customize and Type 1 (we need to printer one side first and then second later)
Step: 6 ) After click on more settings you may see text like Print using system dialog or click on control+shift+p on keyboard or you may be see option like properties.
Step: 7 ) Then you will be get print system box & click on preferences button then you see the option for Document size in that drop down select user defined (mostly last option).
Step : 8 ) After that you will get user defined paper size box will open in that give name under paper size name (mostly keep it as rice card size or anything you will easily remember) then adjust the width as 90 and height as 150 make unit as mm and click ok then you can observe the name you gave before will be added into that left box.
Step: 9 ) Click ok for two times and then click on Apply on print system box and click cancel.
Step: 10 ) Now you will on Rice card page, click print or control+p and printer box will open.
Step: 11 ) Now on paper size drop-down you will see the name what you gave in Step:8 and select that name with respective select scale as default and click print and you will ready to go .
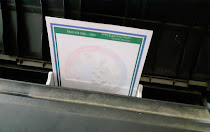
Tip : The Empty rice card head as to go inside the printer like these.
Comments
Post a Comment